
Alrighty, hold onto your seats, because we're about to take a ride through the hilarious world of creating a dynamic autopilot group in Intune and attaching it to the autopilot deployment profile! Buckle up and let's get started!

Step 1: Create the Dynamic Group
To start, we're gonna need a group. But not just any group, a dynamic group! Navigate to the Microsoft Endpoint Manager admin center and select "Groups". Click on "New Group" and select "Dynamic Device" group. Give the group a name like "The Autopilot Alliance" and provide a wacky description.
Step 2: Define the Membership Rules
Now, this is where the real fun begins! To define the membership rules for the dynamic group, you can use various attributes such as device properties, user properties, and group properties. For example, you can define rules based on device model, operating system version, or location. Let's get creative and use something like "Devices that have been dropped at least once" or "Users who have spilled coffee on their laptops."
Or if you're not feeling fancy, just name it Autopilot 😪 and use the below dynamic membership rule which will add the devices in this group once your upload their hardware hash.
Query: (device.devicePhysicalIDs -any (_ -contains "[ZTDID]"))

Step 3: Review and Create the Group
Before we move on, make sure to review your hilarious membership rules to ensure they're accurate and not too offensive. Once you're ready, click on the "Create" button to create the dynamic group.
Step 4: Create the Autopilot Deployment Profile
We're not done yet, folks! To create an autopilot deployment profile, navigate to the "Devices" option in the Microsoft Endpoint Manager admin center and select "Windows Enrollment". Then, click on the "Deployment Profiles" option and select "Create Profile". Give the profile a funny name like "The Flying Autopilot Circus" and select the "Autopilot" deployment mode.
Here is an example for the settings which I use for my Autopilot profile.
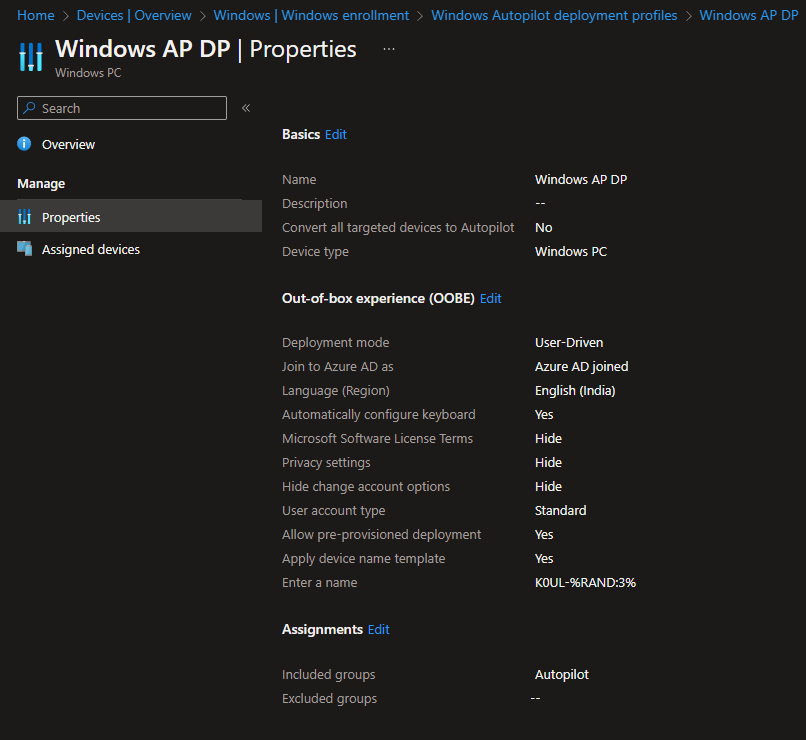
Step 5: Attach the Dynamic Group to the Autopilot Deployment Profile
In the "Assignments" section of the autopilot deployment profile, you can specify the dynamic group as a target for the deployment. Click on the "Select Groups" button and select the dynamic group you created in step 1. Imagine the possibilities here: "Send all the clowns to the front of the line" or "Pilot error-prone devices only."

Step 6: Review and Save the Autopilot Deployment Profile
Before we finish, it's important to review all the settings carefully to ensure that they're accurate and, most importantly, hilarious. Once you're satisfied with the settings, click on the "Save" button to save the profile.
Conclusion
Creating a dynamic autopilot group in Intune and attaching it to the autopilot deployment profile can be a barrel of laughs! By using funny membership rules and wacky group names, you can inject some much-needed humor into your IT management tasks. So next time you're feeling overwhelmed, remember that you can always count on the power of comedy to make things a little easier.


0 Comments